Sticky Keys Sidequest
Overview
As any family's resident “tech guy”, I tend to get handed a lot of the e-junk from people in my life. One thing I got a few years ago was my dad’s old workstation, an OptiPlex. At first, when I plugged it in, I could hear fans start, then die. I tried again, and this time it only lasted a couple seconds before it died–still nothing on the monitor. Once more I attempted to power it on, and this time it stayed on. Third time was the charm, but still nothing posted. It was time to do some digging.
Once the dust storm cleared, I could immediately tell that the hard drive was not plugged in–well, that’s an easy fix. Next, there was a warning that the video card was not plugged in and that I would need an adapter. I looked at the hardware and there was a dedicated graphics card with a DVI output– I was using HDMI and didn’t have an adapter on hand, so I just took out the graphics card. Success! It finally booted and I heard that nostalgic Windows chime. But this wasn’t a Windows 11, 10, or even 8 machine. It was running Windows 7, which had its mainstream support end in 2015. Despite the workstation's old age, it presented me with a login screen (for which the username and password were LONG gone). Thus, it was time to go into hacker mode.
Scope & Authorization
This testing was conducted on a Windows 7 system, operated offline, for educational and defensive security research purposes only. I conducted this testing ethically, with express authorization.
A quick Google search later revealed an interestingly (but adeptly) named exploit called the “Sticky Keys Exploit”. The way that it works is by exploiting an accessibility feature built into the Windows OS called “Sticky Keys”.
What is the Sticky Keys Hack?
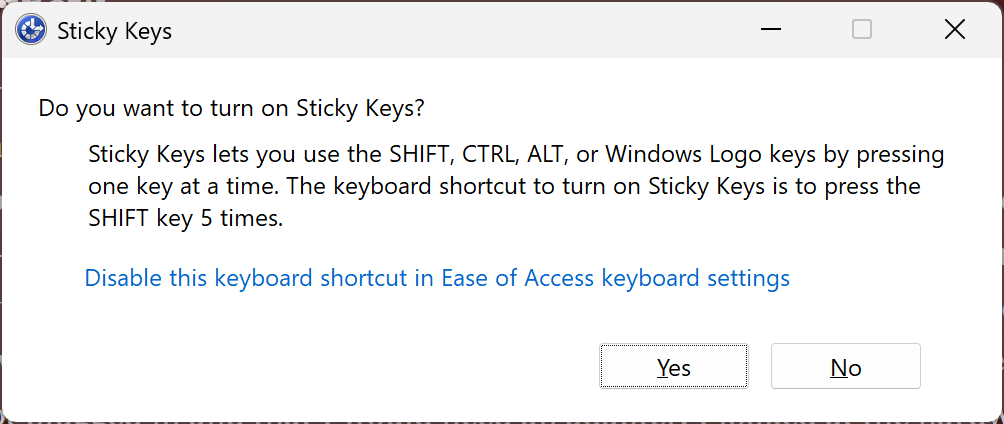
If you’ve ever been frustrated or bored at your computer before, there’s a decent chance you have pressed the Shift key five times in quick succession and triggered a pop up dialogue box asking: “do you want to turn on Sticky Keys?”, accompanied by a loud beep. Sticky Keys as a feature aims to help computer users who have difficulty pressing two keys simultaneously (typically a modifier key such as ‘Ctrl’ or ‘Shift’ and an accompanying key) by allowing them to press single keys to create combinations instead. However, the exploit works by replacing the executable file responsible for Sticky Keys with the executable for Command Prompt. Sticky Keys is launched by Winlogon as SYSTEM, and replacing it causes cmd.exe to also inherit SYSTEM context, which is later triggered by just pressing the Shift key five times. This is an extremely dangerous vulnerability, and while it’s not a huge threat to hardened systems, it successfully circumvents older/unpatched systems just fine.
You might wonder why map cmd.exe to the Sticky Keys executable if you already need administrative level access to do that, and the answer is: you don’t need to. You could run exploits from the command line at the recovery mode step of this hack. A slight clarification here is that what you’re bypassing is OS authentication. The point of the exploit is to gain persistence and pre-authenticated access.
Once the elevated Command Prompt is mapped to Sticky Keys, it gives you: system-level access from the login screen. It gives you a shell without having to provide credentials, even after reboot. In other words, you have a backdoor into the system, even if your account is revoked or the machine is restarted. In a real world scenario, this attack could happen if someone is given admin briefly– through a misconfiguration or unattended machine, or something like that. An attacker could perform the Sticky Keys attack, leave, and come back later when the opportunity is better. Although it took me a while, an attacker who has practiced and prepared could walk in with nothing but a USB stick, restart and boot a computer into the Windows Recovery Environment (WinRE), run three commands, and have persistent access.
Anyways, nothing is ever as straightforward as it seems. As I pressed F8 at the Windows startup menu, I was unpleased to be thwarted by a login prompt to access repair mode. Good OPSEC, but annoying for an attacker such as myself. While the software-level security controls are decent, the physical security is weak, since there is a way to bypass the repair mode security controls. The way to do so is if you boot from external media (like a USB, or floppy disk LOL), you can still access the Windows installation. Thus, I set off to create a bootable Windows 7 USB.
Creating Windows Installation Media
The first step is to download a Windows 7 ISO, because I don’t have one readily available. Finding a safe Windows 7 .ISO in 2025 was more difficult than you might imagine, but I found one published on internet archive that had MD5 and SHA-1 hashes listed, and while both of those are deprecated and outdated by modern standards, some peace of mind is better than no peace of mind. In case you’re curious, here is the link: https://archive.org/details/windows-7-sp0-sp1-msdn-iso-files-en-de-ru-tr-x86-x64/5.%20Windows%207%20Home%20Premium%20Hologram%20DVD%20x86%20English.png
As for which tool to use, I have been using Rufus for many years now and it’s definitely my favorite tool for creating bootable media (sorry, Balena Etcher and Ventoy). Once the bootable media was created, it was time to boot from it and test my workaround.

Naturally, any good sidequest has to keep one entertained. If it’s too easy, it’s not fun (I hit another snag). Basically, to boot from a USB (the BIOS was password locked), I had to find a workaround for the workaround.
Unlocking a password-locked BIOS
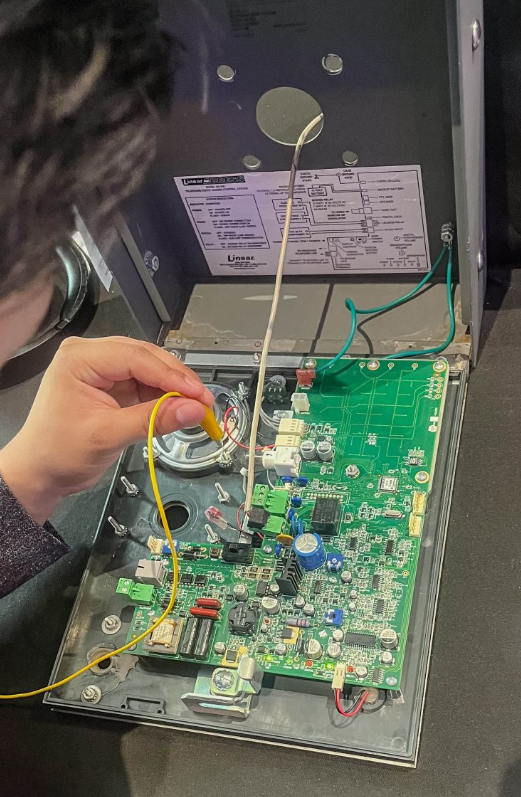
I started with looking up passwords using the serial number, a trick I know has worked before (Shoutout to my friend Toma, with whom I discovered this website). The website I used was: bios-pw.org, which is a good resource for the future. In this case, the passwords didn’t work, so I tried removing the CMOS battery. I first tried for 15 minutes and that didn’t work, so I made sure I drained the computer of all lasting power and then retried it, for a full 20 minutes, which also did not work. Perhaps the password is stored in a separate BIOS chip, who knows. At this point, I realized I would have to go deeper, and started looking online for information. This video about jumping the password pins from My IT workshop really helped.* I have not jumped CMOS pins before this, so I’m glad I have a new tool in my belt to help for the future (although I did do a jumper attack on a door call box in the physical security village at RSAC 2025, here’s a picture of my friend Jeremy also trying it):
Anyways, jumping it gave me this message:
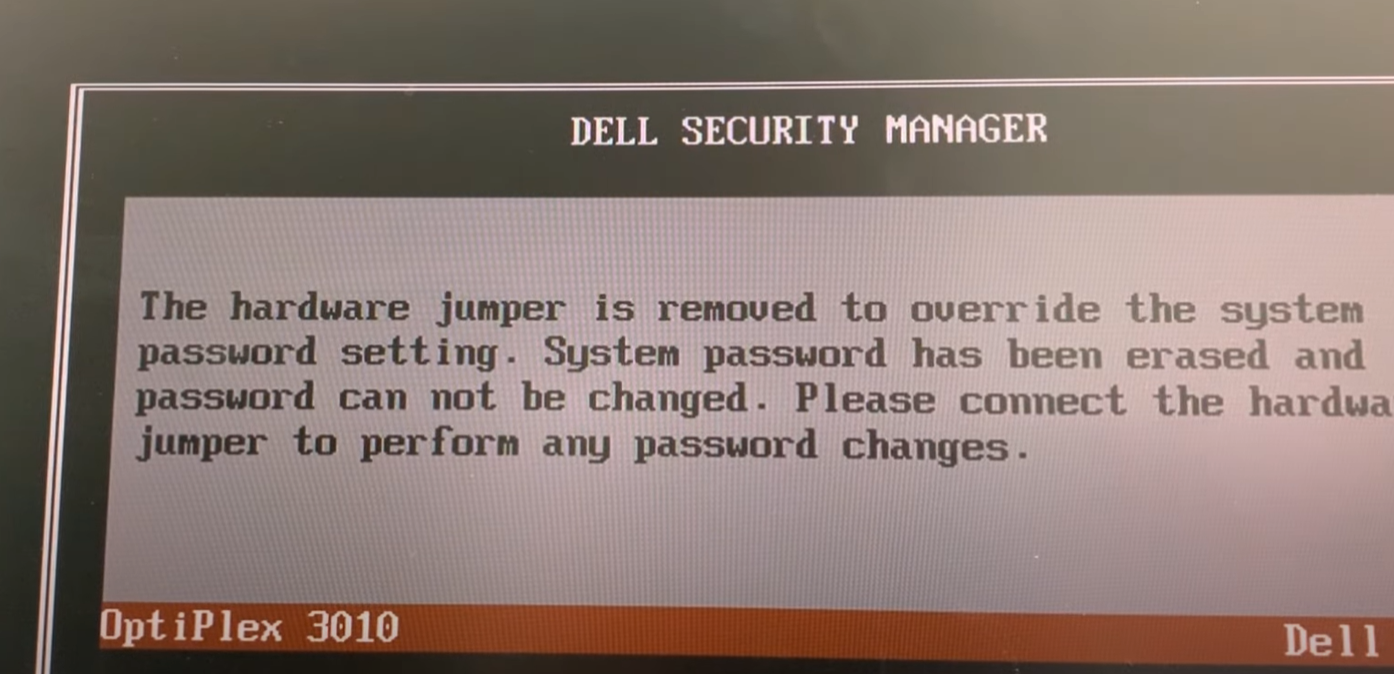
And shortly after, I was in! I could now change the boot sequence and boot from external media. Although I had to go and find tweezers to be able to get that jumper pin out from the small form factor OptiPlex 3010, it was worth the effort.
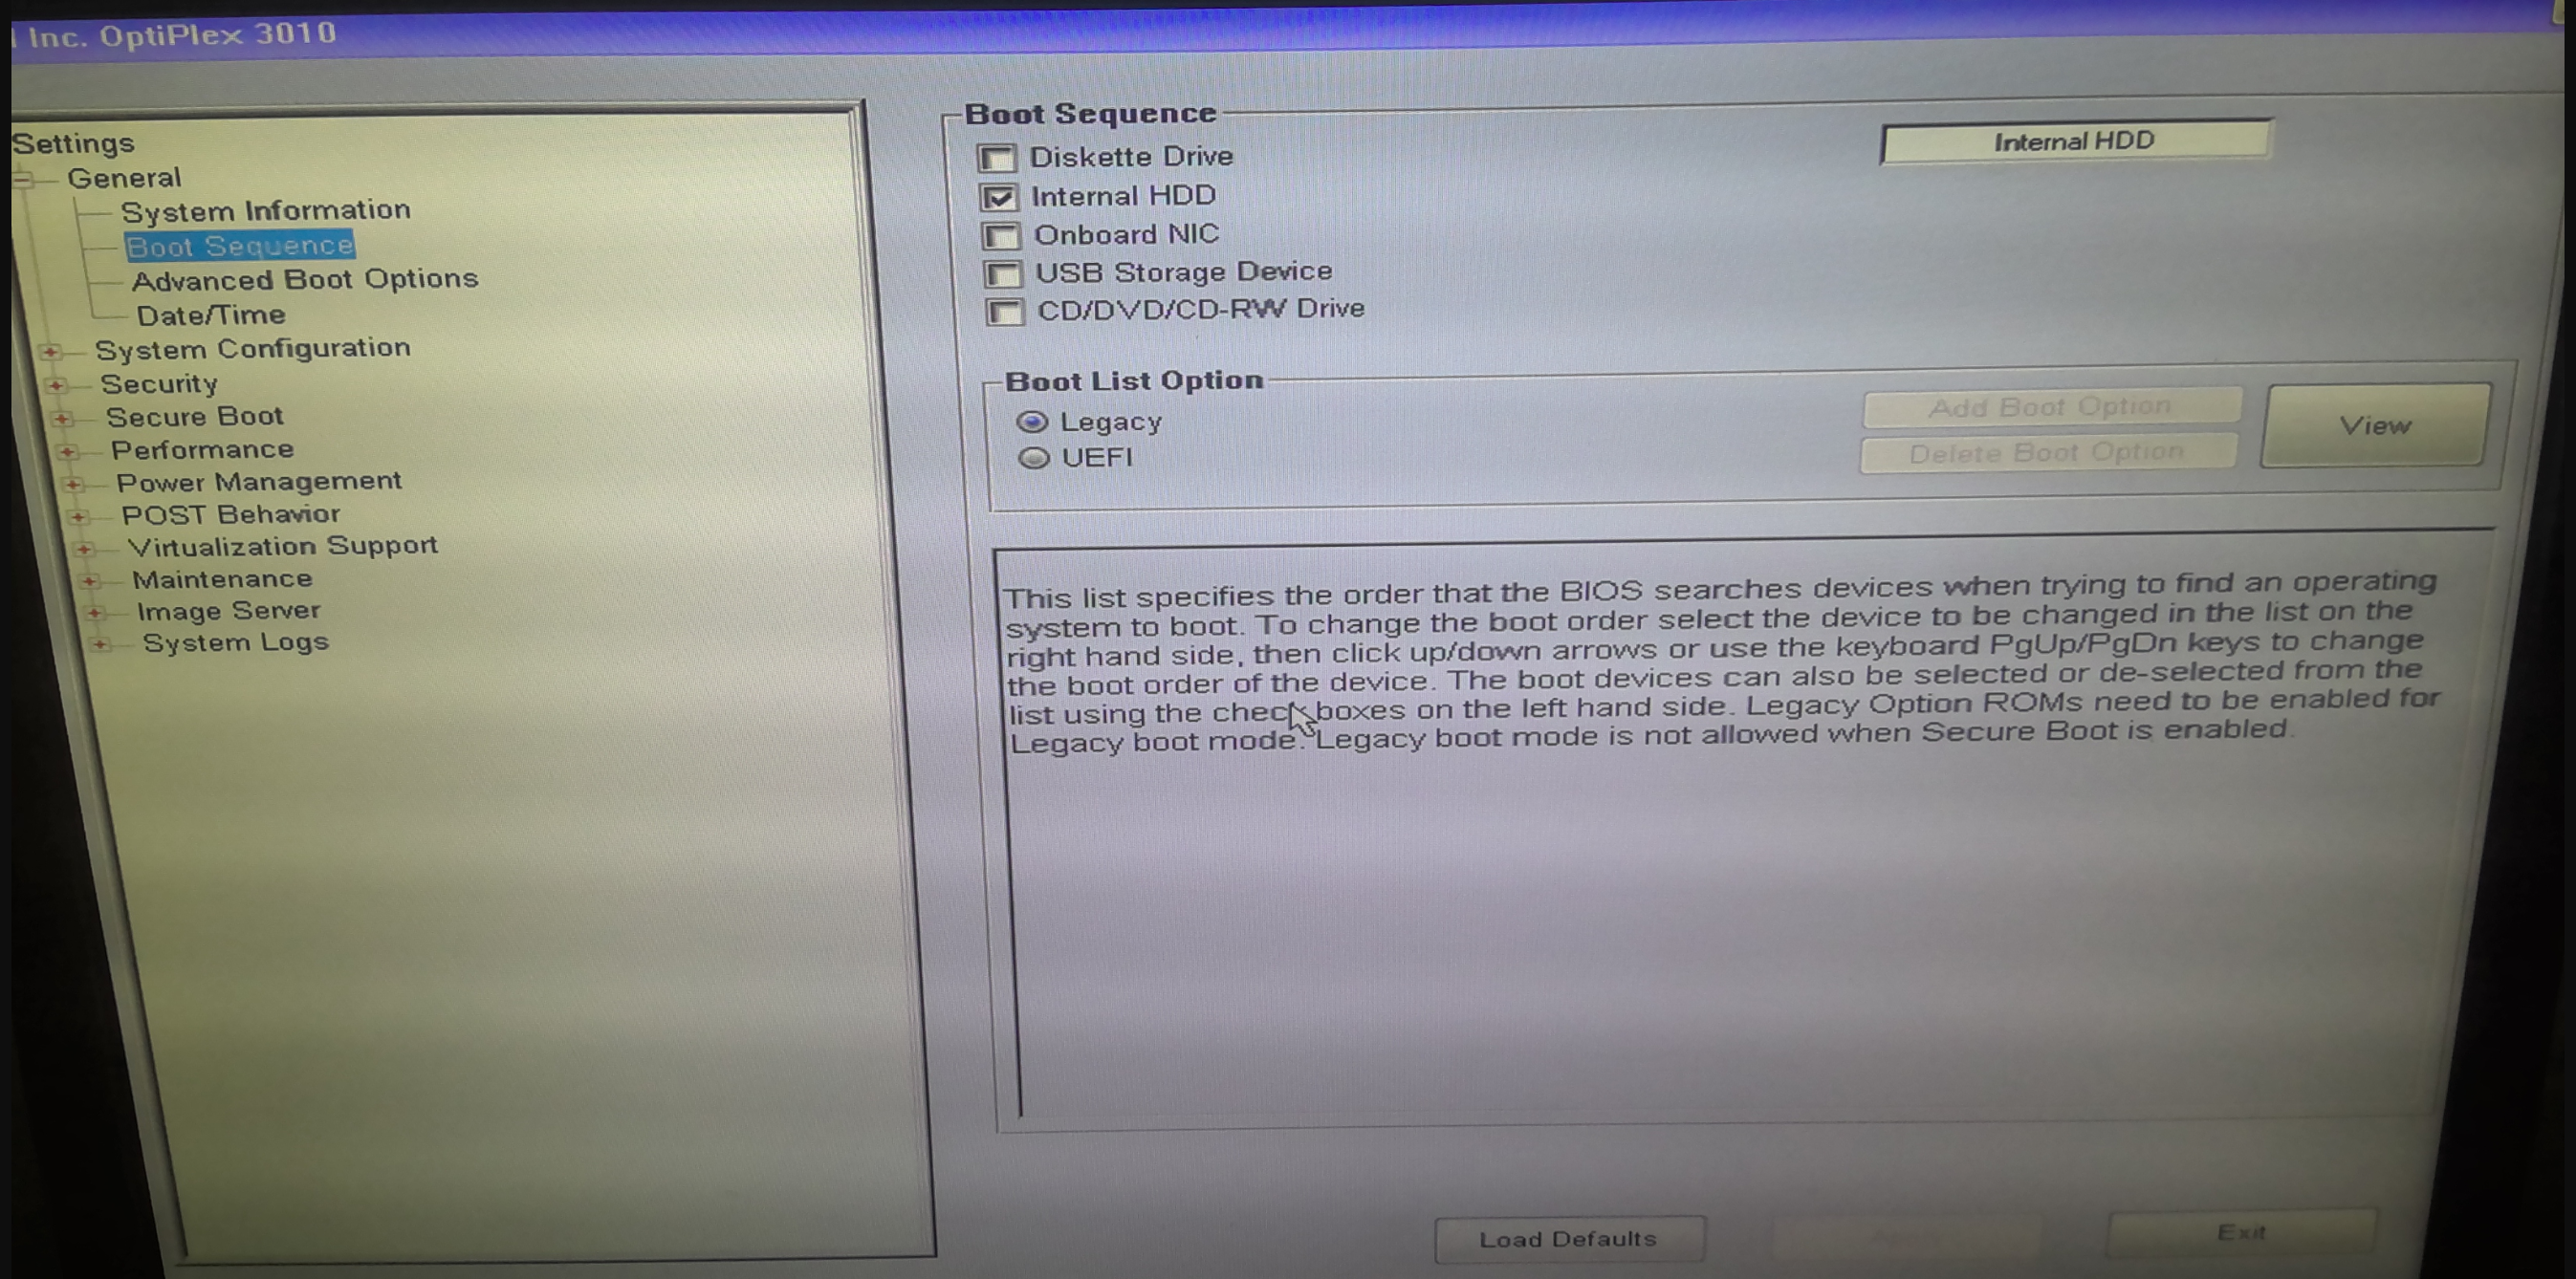
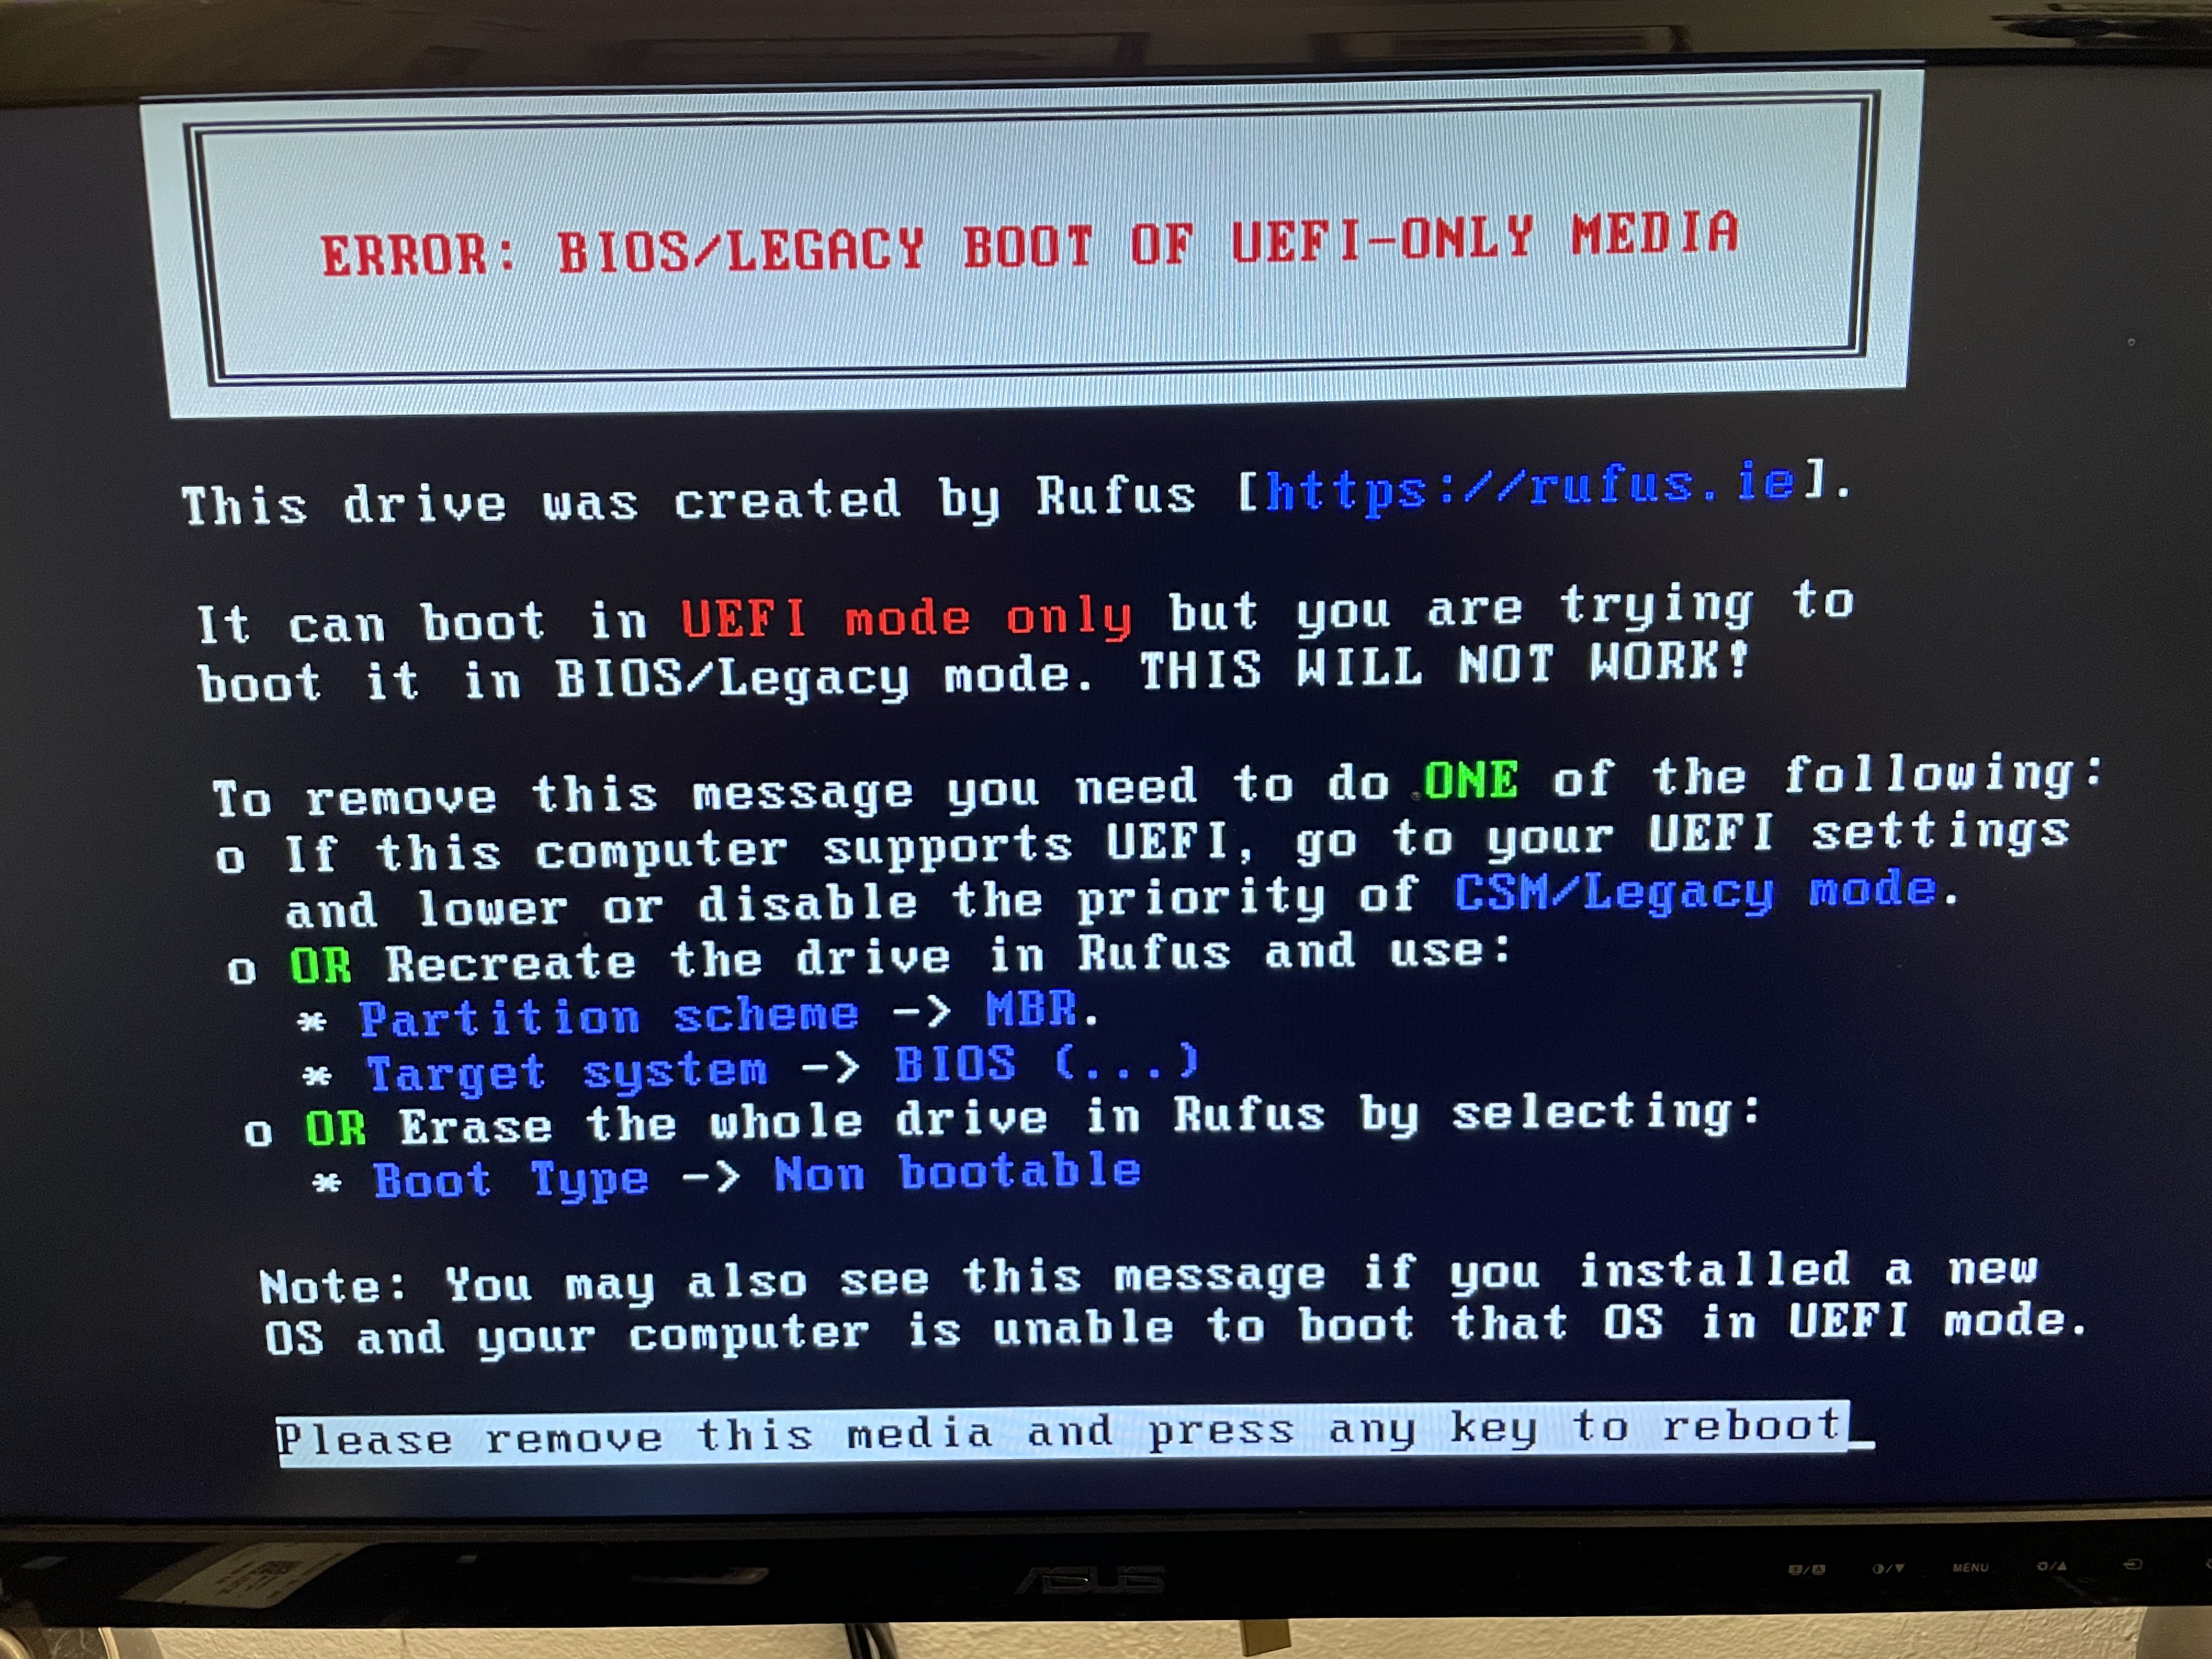
Continuing on my side quest, I plugged in the USB and booted from it and held my breath, only to be met with another issue. BIOS wasn't in UEFI mode, so I had to change then I had to switch the boot mode back into legacy. Also, the Windows ISO that I had downloaded was incompatible with the version of Windows I was trying to recover. I hypothesized it was due to a mismatch between the Windows 7 Professional installation on the drive but the Windows 7 Ultimate installation on the boot media. In reality, it was more likely the UEFI vs Legacy mismatch, but at the time I downloaded a new .ISO and remade the bootable USB. Then, it allowed me to access recovery tools!
Windows Recovery Enviroment
The pentester in me, when met with a blinking shell, immediately wrote “whoami”. Interestingly, this command did not successfully run. The reason behind it is that WinRE uses a minimal environment, which is missing many standard binaries, including whoami. I also ran into other issues, including that the operating system was not found. Turns out, there was an error caused by having the bootable USB in UEFI when the main system disk was in Legacy mode (BIOS). I remade the USB stick and now the operating system was able to access the files correctly.
Anyways, here are the commands I used. First, I used “c:” to switch into the “c:” drive, followed by "dir", and a confirmation that the “windows” directory was present, which proved I was in the right place. If you are following along, just note that your main system drive might be D: instead of C:, as WinRE often mounts the system drive differently.
C:
dir
Then, I copied the Sticky Keys Executable (sethc.exe) to the root of the C:\ drive in order to have a backup of sethc.exe so I could cover my tracks later.
copy c:\windows\system32\sethc.exe c:\
Then I copied cmd.exe over sethc.exe:
copy c:\windows\system32\cmd.exe c:\windows\system32\sethc.exe
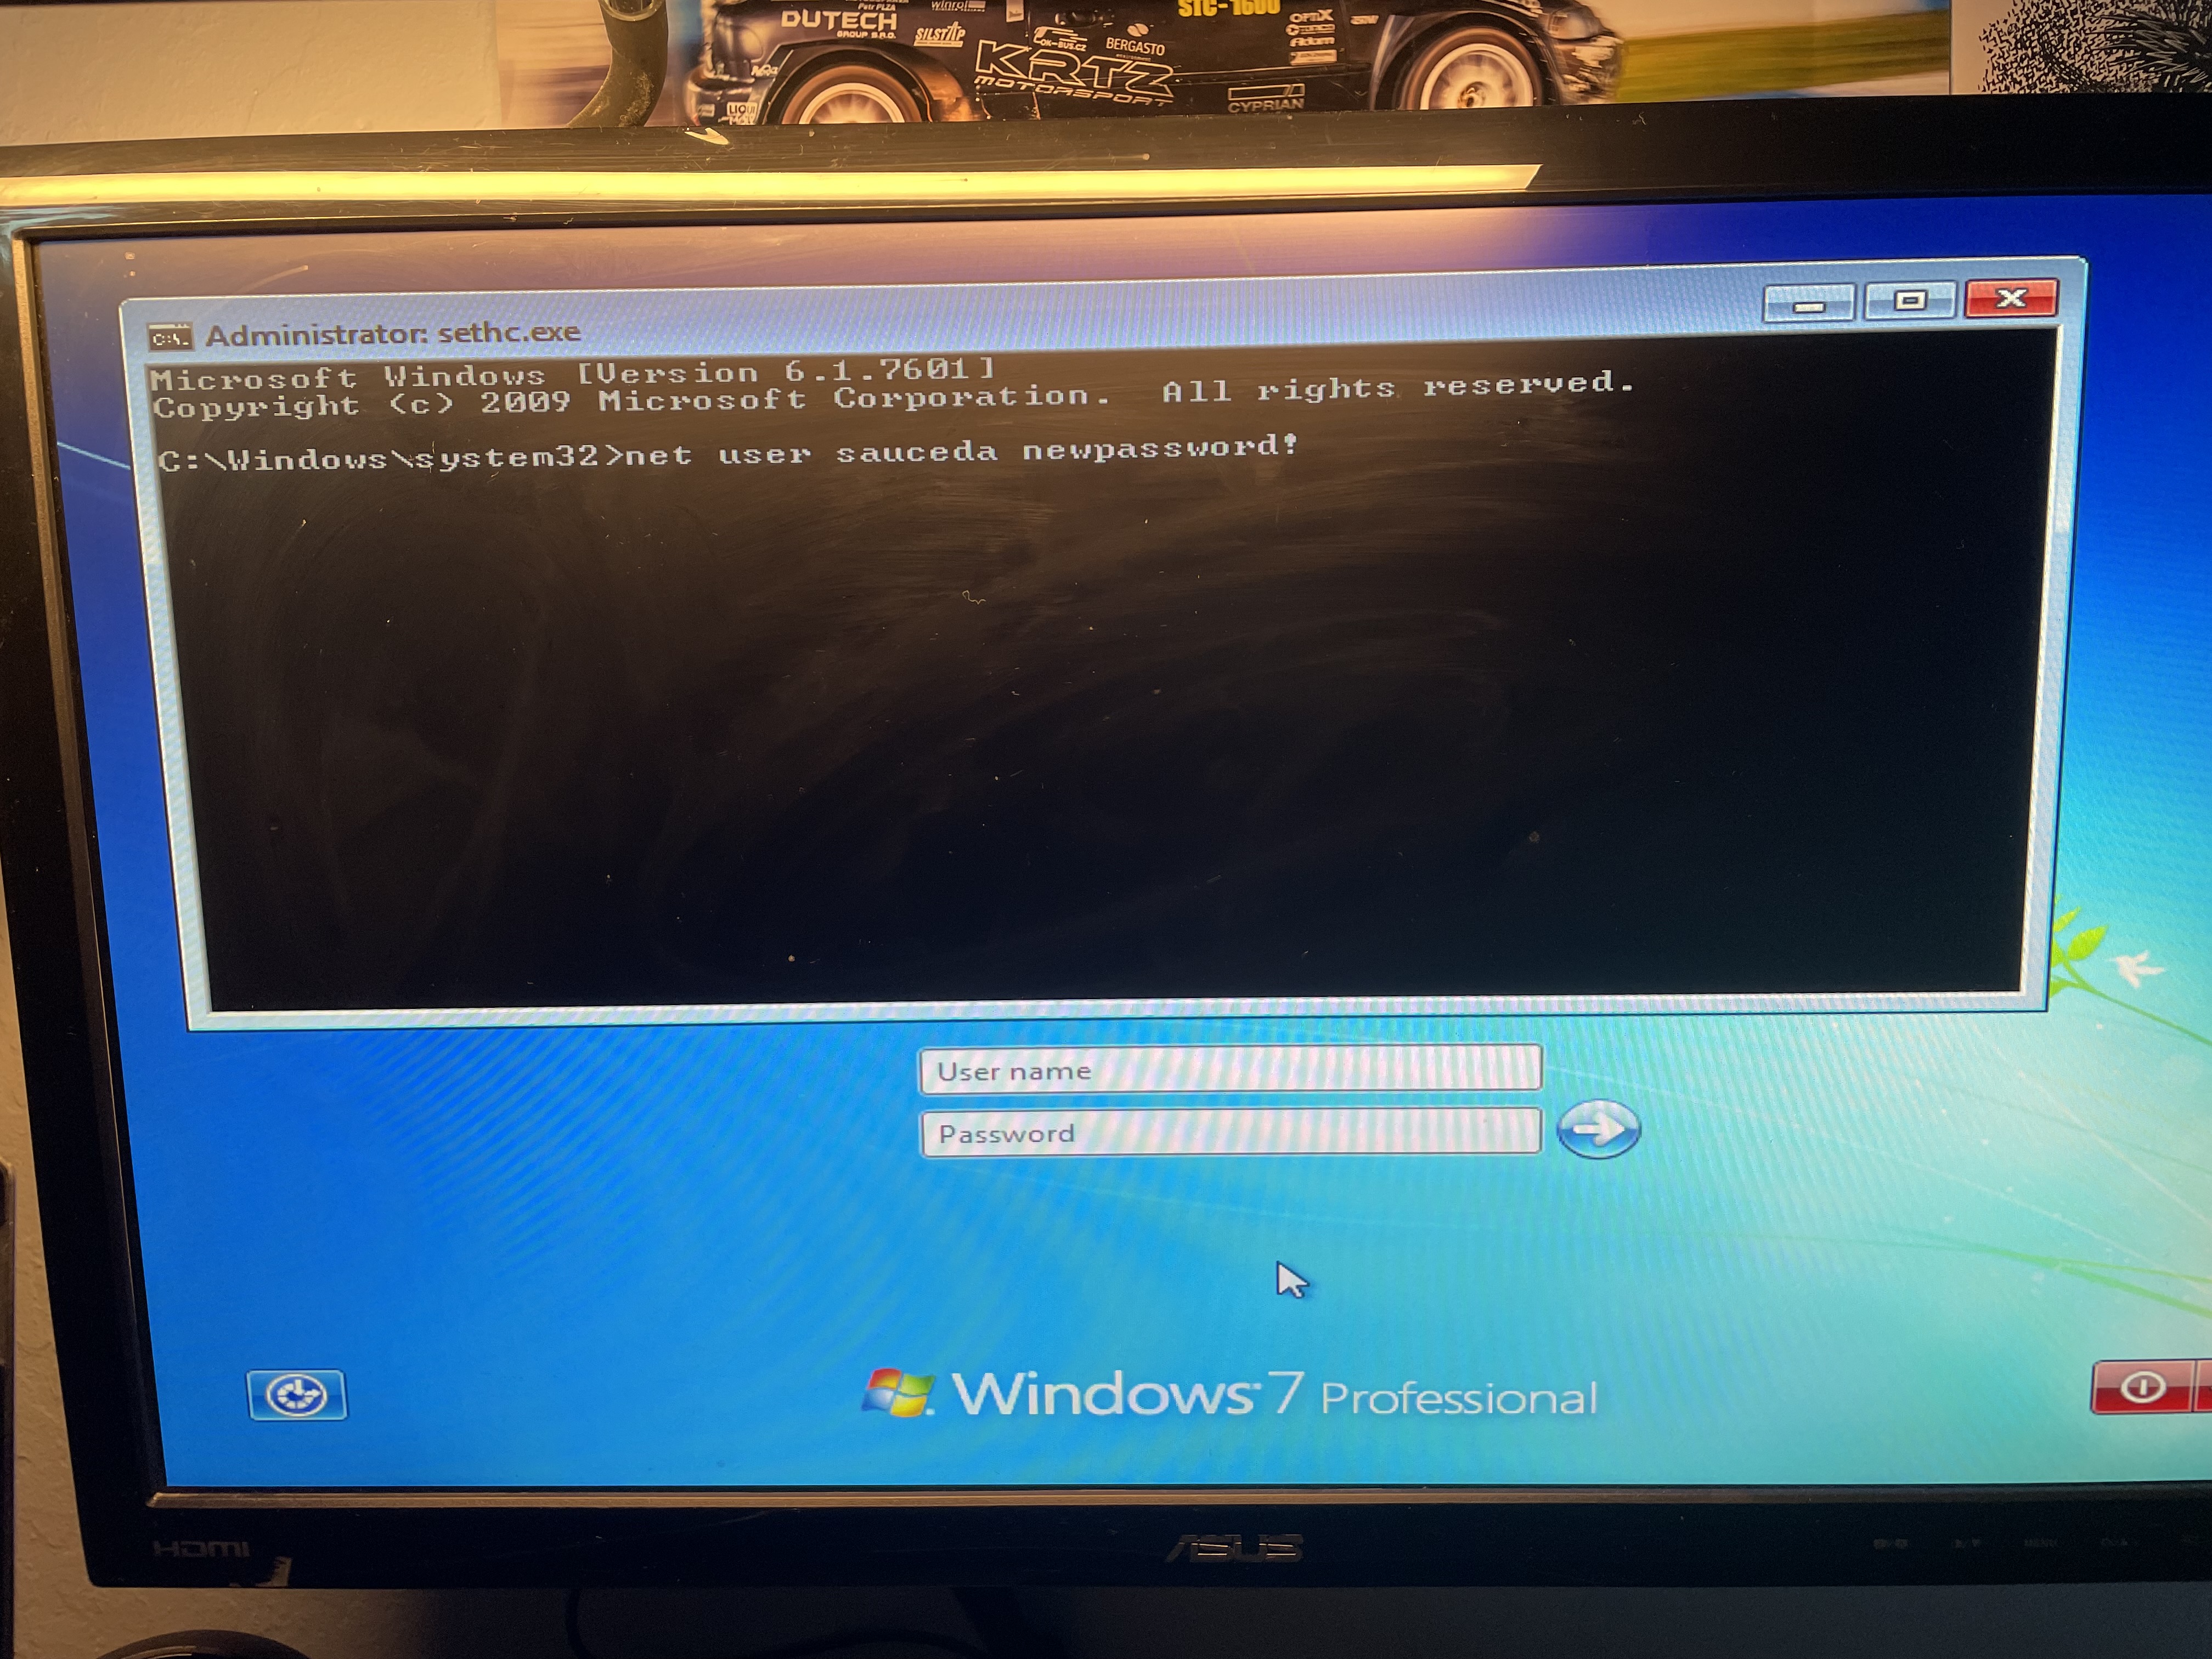
At this point, the Sticky Keys hack had been completed! Now I rebooted the PC and pressed Shift a bunch of times at the login.
Then, when the prompt came up, I used net user (at the login screen), and I changed my dad’s password, and then logged on.
Impact
While one might expect that such an outdated attack is no longer relevant in an AI-driven detection filled world, it’s still very much a problem. According to StatCounter OS market share data, an estimated 3.8% of the world’s computers still run Windows 7 in December of 2025.
Source: StatCounter Global Stats - Windows Version Market Share
That number may seem small, but it means that out of the over 1.5 billion active Windows PCs, some 57 million systems are still running Windows 7, and are vulnerable to this hack. Additionally, while I have not personally tested these other versions, I have read reports that tested and successfully exploited the Sticky Keys hack on Windows 8, Vista, XP, and even 10 and 11. However, newer versions of Windows require much more complexity, as System32 is protected by Windows Resource Protection, Secure Boot and BitLocker, which means to successfully pull off this attack on a newer machine, you would have to modify the Windows Registry or Access Control Lists offline.
How to defend and protect against this attack
From a defensive standpoint, the Sticky Keys hack fails against hardened systems. A password‑locked BIOS, when combined with proper physical security, prevents changing the boot order, disabling external boot devices, or disabling secure boot or ‘UEFI-only’ mode. Proper physical security means that to prevent an attacker from being able to jump the pins and bypass BIOS authentication as I did, you can lock the PC or server room. Additionally, implementing a file integrity monitoring tool will detect a change and can also detect persistence by watching out for other files an attacker would change once in.
Lessons Learned
Along with a sense of satisfaction for finally triumphing over an old, outdated security system (which still required multiple of the myriad tricks up my sleeve), I also gained some important insight from this project: physical security matters. Also, firmware security does not equal OS security.
As for the next evolution from this sidequest, my next project will be to write a file integrity monitoring system that will help detect when files such as sethc.exe have been changed, because that’s one of the best ways to detect such attacks.
References
- Microsoft documentation on Sticky Keys / Winlogon: https://www.microsoft.com/en-us/surface/do-more-with-surface/defining-sticky-keys
- StatCounter Global Stats — Windows Version Market Share: https://gs.statcounter.com/windows-version-market-share/desktop/worldwide
- Rufus (Bootable Media Creation Tool): https://rufus.ie/
- BIOS password recovery resource: https://bios-pw.org/
- My IT Workshop — CMOS jumper password reset video: https://www.youtube.com/watch?v=lKoRY7NL6vI
- Internet Archive — Windows 7 Original (x86–x64) MSDN ISO Files (SP0–SP1): https://archive.org/details/windows-7-sp0-sp1-msdn-iso-files-en-de-ru-tr-x86-x64/5.%20Windows%207%20Home%20Premium%20Hologram%20DVD%20x86%20English.png